JIRA Profile
The JIRA Profile represents a collection of settings on how The Connector will perform the data exchange. The Connector allows configuration of multiple profiles, each having different settings. You can then select a profile to use depending on the action you wish to perform. Each profile can connect to a different JIRA instance or you can have multiple profiles connecting to the same JIRA instance, but having different configuration options.
Profile Alias - The alias is simply a user definable name for the profile. When you are asked to select a profile, you will be given an option to choose amoung these names.
JIRA Connectivity - The JIRA Connectivity provides the setting on how to connect to JIRA. This includes an IP address or URL along with an optional port number. It can also be configured to use proxy servers and HTTP authentication depending on your server configuration.
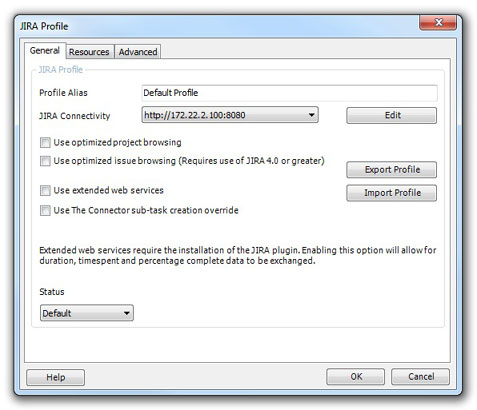
The Connector provides import/export ability for you to quickly and easily share your profile settings with other users. You can export the profile to an XML file and share that XML field with other users who can import in your settings.
Export Profile - Prompts you for a filename to export your settings to.
Import Profile - Prompts you for a filename to import your settings from.
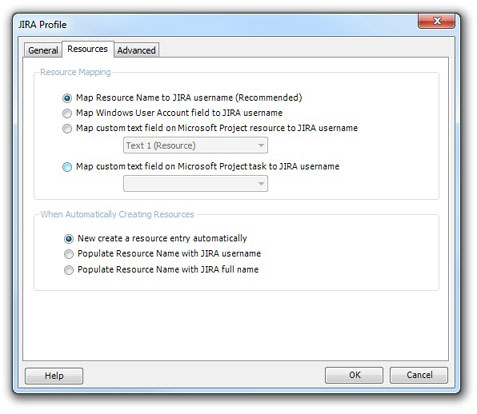
The Resources tab of the JIRA Profile configuration dialog allows you to configure how you wish to map resource names. This can be done differently for each profile you have configured.
There are 4 ways resources can be mapped using The Connector
Map Resource Name to JIRA username (Recommended) - The easiest and most basic way to map resource names is to ensure that the JIRA username and the Microsoft Project resource name are the same. This allows a one-to-one mapping when data is exchanged.
However, sometimes this one-to-one mapping is not sufficient. If you wish to have a different value in Microsoft Project then you have in JIRA, you must map the resource names so that the value in Microsoft Project knows what the JIRA username is. This can be done using one of the 3 mapping modes specified below.
Map Windows User Account field to JIRA username - This will use the Window User Account field (found on the resource in Microsoft Project) to hold the JIRA username.
Map custom text field on Microsoft Project resource to JIRA username - This will use a custom text field found on the resource in Microsoft Project to hold the resource mapping. There are 30 Text fields on the resource that can be used to hold this value.
Map custom text field on Microsoft Project task to JIRA username - This will use a custom text field found on the task in Microsoft Project to hold the resource mapping. There are 30 Text fields on the task that can be used to hold this value. Be sure that it is a Text field that is not currently being mapped to hold other JIRA information.
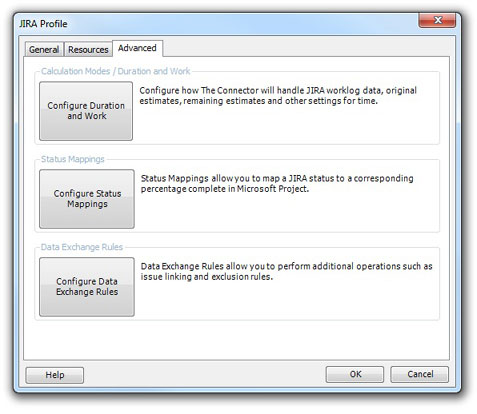
The Advanced tab of the JIRA Profile configuration provides buttons for configuring various other settings for The Connector.
Configure Duration and Work - The duration and work configuration allows to configure how the values for the original estimate, remaining estimate and timespent values relate between Microsoft Project and JIRA. Click for more information
Configure Status Mappings - The status mappings allow you to configure how The Connector will use JIRA statuses to calculate percentage complete. Click for more information
Configure Data Exchange Rules - The data exchange rules allow you to control how The Connector will handle JIRA links and other types of exclusion rules. Click for more information